Amazon Associates Link Builder Plugin How to Set It Up and Use It
Amazon recently released a beta version of its first official free WordPress plugin for the Amazon Associates Program. It allows WordPress users to easily search for products in the Amazon catalog and add real-time information to their blog post. I’m going to show you how to set it up and add Amazon products.
In the past, if I wanted to include an affiliate link to a product on Amazon, I opened a Amazon Associates in another window and logged in. Then I’d search for the product in Amazon’s link builder tool and copy the link that it generated back into my post text. Using this plugin, I can do all that from within my WordPress post.
Setting It Up
It’s not terribly difficult, but it may be intimidating to the average non-techie. I would recommend keeping the instructions page open in another browser window and referring back to it. The set-up only took a few minutes—once I followed the directions and stopped trying to wing it. 😉
Install the Plug-In
You’ll want to install the plugin on your self-hosted WordPress site. If you’ve done it before, skip ahead. If you don’t know how, here’s some information on how to do it, complete with an instructional video.
Once the plugin is installed and activated, you’ll come to the settings page, like this:
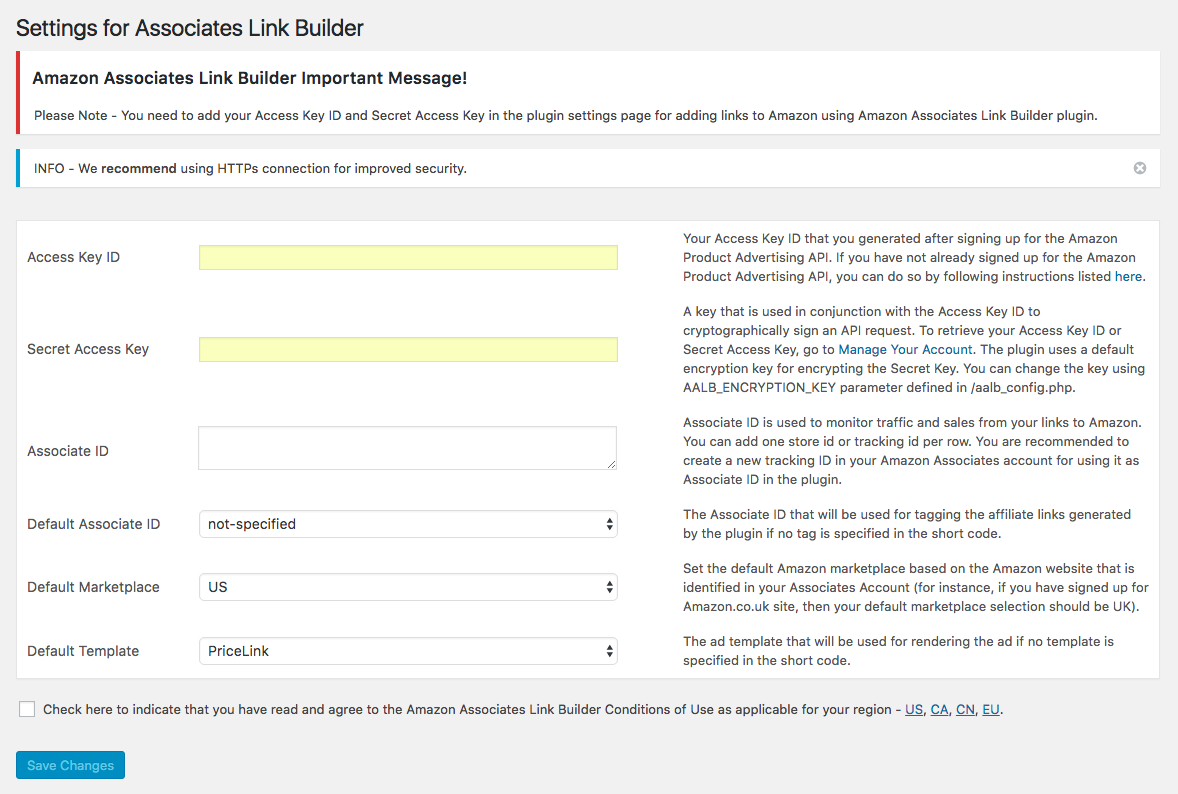
Amazon Associates Link Builder plugin settings page
You’ll need to insert the two keys from the next step in the first two fields (yellow). Your associate ID from Amazon Associates goes into the third field. Select a default associate ID, marketplace and template, then save your changes. You’ll need to check that you read the conditions before you’ll be able to save. It’s a short page, so you’ve really got no excuse to read it first!
Get Your API Keys
First, you need to be a member of the Amazon Associates program. If you’re not already, you’ll need to sign-up. If you are, go ahead and log-in.
Next, you’ll need to sign-up for the Amazon Product Advertising API from your Amazon Associates account. Select “Product Advertising API” from the “Tools” menu from within your Associates account (as below).
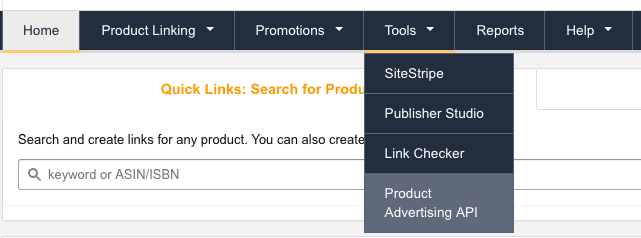
Product Advertising API
There is a “sign-up now” button on that page that will take you through the process. Once you’ve submitted the form and been approved, select “Manage Your Account” from the “Success” page.
Follow the instructions on this page from #6. After you get to the Access Keys page, click on “Create New Access Key.” There will already be one created by joining. Create a new one for the API. This confused me for a little bit until I read the instructions. Download the file. It will contain the keys you need to set up the plugin.
Now go back to WordPress and enter the required information in the plugin’s settings page and save it. Now you can get started using the plugin.
Using the Plugin
Once the plugin is all set-up, you can start adding Amazon products to your post or page. Here’s how the edit screen looks with the plugin activated and set-up.
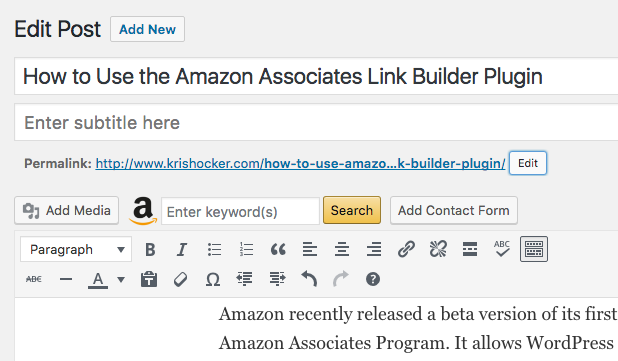
WordPress interface with Amazon plugin
The plugin adds a search box to the post interface as show in the image above. Don’t have the second title field? That’s okay. It’s only there because I’ve got a subtitles plugin installed that adds that field.
To start inserting a product or products, enter a keyword in the field beside the Amazon logo, and click search. You can enter a keyword, title, author, manufacturer, etc. I entered my name and here’s what I got back:
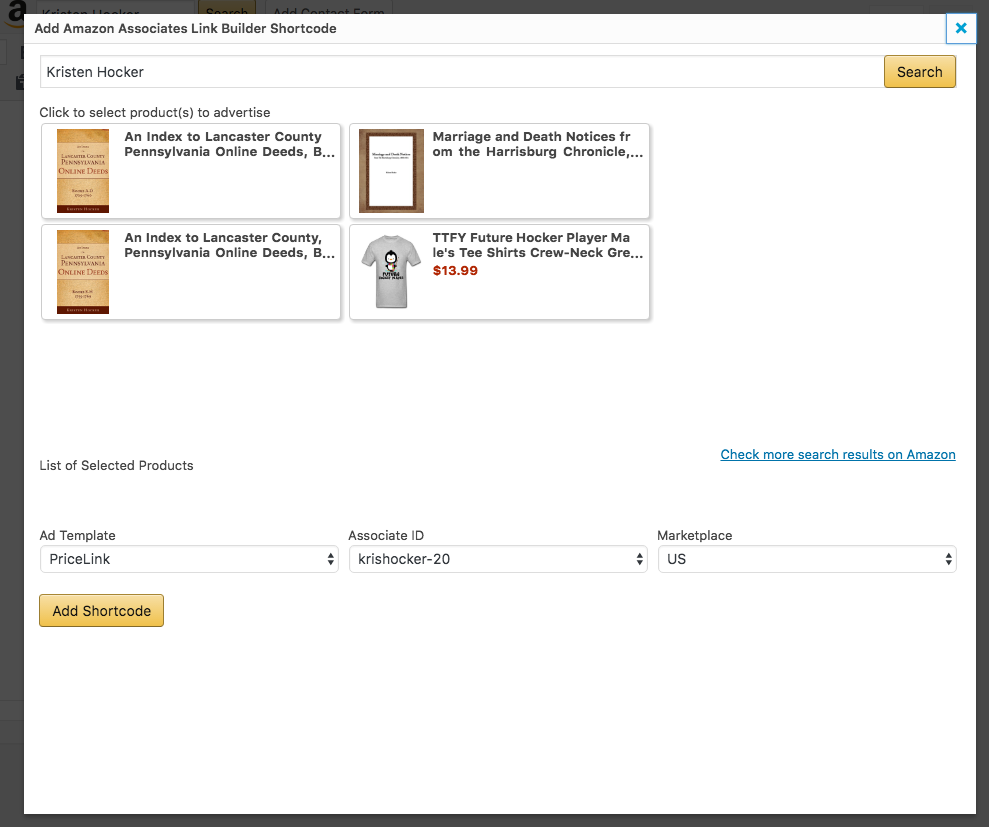
Amazon Associates Link Builder plugin search for Kristen Hocker
Only three of those are really what I’m looking for, but… I can select the products I want by clicking on each one, and then the type of template I want to insert, the associate ID (if I had more than one), and the Amazon marketplace. Here are examples of each of the templates using these product(s). 1
Product Carousel:
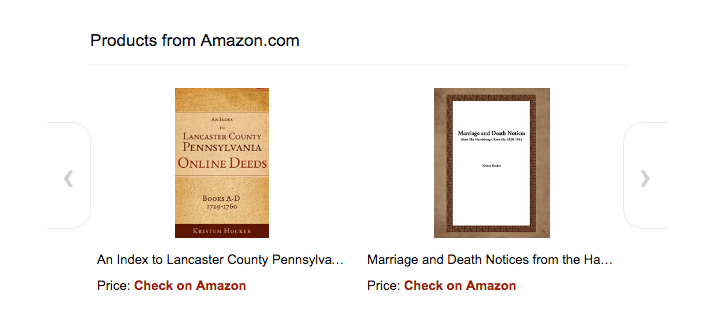
Product carousel
Product Ad:

Product ad
Product Grid:
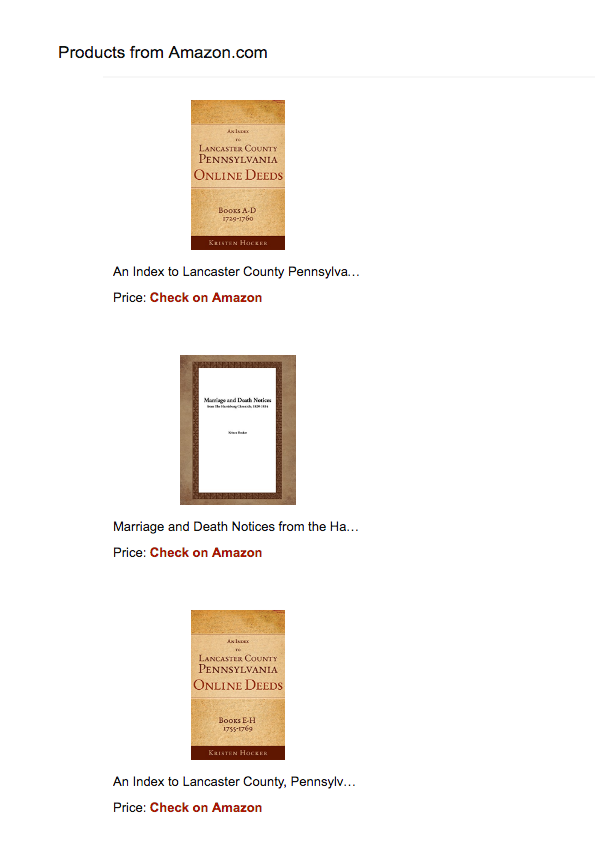
Product grid

You can also set-up your own templates. I did a quick clone of the “Price Link” template, and used just the product title instead of just the price. I wanted to be able to insert a book title into existing text.

Here’s what the output looks like used within a sentence:

It inserted the book title and series information. The shortcode looked like this in my text:

Conclusions
The plugin is still in beta, so there are still updates and changes to come. Amazon is looking for feedback. You can read more, including FAQs, and see more screenshots on the WordPress site.
The set-up is a little more involved than most WordPress plugins, but that’s the cost of working with an API. Still it wasn’t terribly time-consuming, and if you follow directions, not difficult at all.
Footnotes
- They’re image captures to save bandwidth and in case I have to deactivate the plugin for any reason in the future. ↩
Cite This Page:
Kris Hocker, "Amazon Associates Link Builder Plugin How to Set It Up and Use It," A Pennsylvania Dutch Genealogy, the genealogy & family research site of Kris Hocker, modified 16 Jan 2017 (https://www.krishocker.com/how-to-use-amazon-associates-link-builder-plugin/ : accessed 22 Apr 2025).
Content copyright © 2017 Kris Hocker. Please do not copy without prior permission, attribution, and link back to this page.
2 Replies to “Amazon Associates Link Builder Plugin How to Set It Up and Use It”
Comments are closed.

Hi Kris, thank you for a great article.
Can you provide guidance on how to customize the template Amazon Associates Link Builder Plugin to attract people to buy through my website?
Thank you for your help
Hi, I’m glad you found the post useful. Unfortunately I have not explored the templates or how to customize them. The Amazon Associates site would probably be the best source of information.